When to use this plugin
This is the Content Gate connector for Microsoft Dynamics for Customer Engagement. This connector can only be installed on Microsoft Dynamics for Customer Engagement environments.
The connector adds the Axtension® Content Gate functionality to the Microsoft Dynamics for Customer Engagement instance and enables the embedded and web document management functionality that Axtension® Content Gate offers.
If you do not have a Content Gate environment yet and wish to use Content Gate on your Microsoft Dynamics for Customer Engagement instance, please reach out to info@signupsoftware.com.
How to install the plugin
Execute the following steps in order to install the Axtension® Content Gate connector:
Open Microsoft Dynamics CE and navigate to Advanced Settings > Customizations > Solutions
Click 'Import solution' in the toolbar of the Solutions view
In the dialog box that opens, browse to the solution file and select it
Click Next
- When asked, check the option "Activate any processes and enable any SDK message processing steps included in the solution.".
- Click next and start the import.
When the import has finished, check the Import Solution dialog box if any errors have occurred and resolve them.
Find the imported 'Axtension Content Gate' solution in the tab 'Solutions'. Open it and click 'Publish all customizations'. This will allow you to implement the plugin with its custom view, embedding Content Gate within CE.
How to implement the plugin
This documentation describes a generic way in which the Content Gate view is added to an entity by adding a tab in the entities main overview. Depending on the version of the installed Content Gate connector and the powerapps environment the precise steps or labels might vary, but in general the steps are the same and consist of adding a custom Content Gate component to an entities form.
Current connector version
- Go to make.powerapps.com, select the right environment in which you want to add a Content Gate view.
- Navigate to the Table of the entity you want to edit. E.g. Tables > Account if you want to add Content Gate to the Account entity.
- Go to Forms.
- Click the form in which you want to add a Content Gate view. Most of the time you are looking for the main form. (e.g. for the Account entity this is the form named 'Account' with form type 'Main'). You are now taken to a screen where you can edit the form.
- Select the location where you want to embed Content Gate. A common practice is to add a new tab to the header bar by dragging the '1-column-tab' component there.
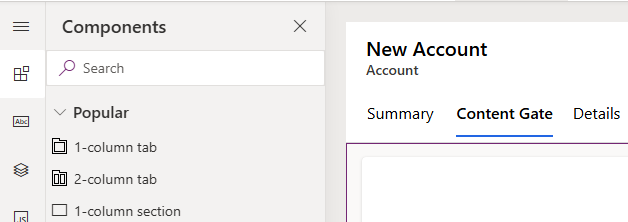
- Drag the Content Gate component to the place where you want to embed Content Gate.
- In the sidebar select 'Components'.
- Under 'More components' look for the 'Content Gate Viewer'. If it is not there. Add it by clicking 'Get more components' in the bottom of the screen.
- Drag the 'Content Gate Viewer' component to the place where you want to embed Content Gate. You should get a dialog asking for some information.
- Table column: select a dummy column. It doesn't matter which column, since we are going to hide this. However it is advised to select a column which is not locked, because you might see a lock symbol which cannot be hidden otherwise.
- Entity Type: type in the entity type name. E.g. for the Account entity type in 'account'.
- Entity Id: check the 'Bind to table column' checkbox. Select the column which contains the entity id, often named after the entity. E.g. for the Account entity select 'Account (Text)'.
- Number of rows: set a desired height by setting the number of rows.
- After adding the Content Gate component hide the label of the dummy table column.
- Click Save and Publish. After this is done test the component in CE.
Legacy connector version
- Go to make.powerapps.com, select the right environment in which you want to add a Content Gate view.
- Navigate to the Table of the entity you want to edit. E.g. Tables > Account if you want to add Content Gate to the Account entity.
- Go to Forms.
- Click the form in which you want to add a Content Gate view. Most of the time you are looking for the main form. (e.g. for the Account entity this is the form named 'Account' with form type 'Main'). You are now taken to a screen where you can edit the form.
- Select the location where you want to embed Content Gate. A common practice is to add a new tab to the header bar by dragging the '1-column-tab' component there.
- Drag the Content Gate component to the place where you want to embed Content Gate.
- In the sidebar select 'Components'.
- Under Display select the 'HTML web resource' component and drag it to the place where you want to embed Content Gate. You should get a dialog asking which web resource to add, search for the 'axt_/ContentGateConnector/Pages/Embedded.html' component and add it.
- Give the added component an appropriate label, name and height.
- Click Save and Publish. After this is done test the component in CE.